
How to lay tiles without masonry
Installation
Installation guide for Immediatile products

1/4 INSPECT & PREPARE SURFACE
Inspect all materials for variations in shade. ImmediaTile is made from natural materials and shade variation is a normal effect of those materials. No consideration for exchange can be accepted after installation.
Make certain the substrate is flat. Surface must be checked for flatness with a straight edge and not deviate by more than 2 mm within 60 mm. Leveling compound can be used to level most floors.
ImmediaTile can be installed on drywall, cement board, plywood and plaster.
ImmediaTile can be installed over flat, clean, dry and dust free interior surfaces that are not subject to standing water.
ImmediaTile should not be installed over uneven surfaces.

2/4 APPLY BOND ENHANCER
Surface must be clean, dry and dust free. Painted surfaces that are high gloss, oil based of flaking may need to be slightly sanded.
All grease, oil or cleaning products must be completely removed prior to installation.
The unique pressure sensitive adhesive will only bond to a substrate if there is not contaminate between the adhesive and substrate.
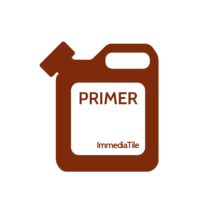
Once the substrate is dry and dust free, a thin coat of ImmediaTile Bond Enhancer or, for wet areas such as shower walls, ImmediaTile waterproof membrane should be applied.
Bond Enhancer should be applied with a sponge roller in a thin coat. The substrate should only be damp to the touch after the bond enhancer will be applied.
As little bond enhancer as possible to cover the surface should be used. It will normally dry within 30 minutes.
Waterproof membrane should also be applied with a sponge roller following the instructions on the package. Depending on the substrate and conditions dry time will vary.
Either primer must be completely dry prior to installing tile.
All grease, oil or cleaning products must be completely removed prior to installation.
The unique pressure sensitive adhesive will only bond to a substrate if there is not contaminate between the adhesive and substrate.
Once the substrate is dry and dust free, a thin coat of ImmediaTile Bond Enhancer or, for wet areas such as shower walls, ImmediaTile waterproof membrane should be applied.
Bond Enhancer should be applied with a sponge roller in a thin coat. The substrate should only be damp to the touch after the bond enhancer will be applied.
As little bond enhancer as possible to cover the surface should be used. It will normally dry within 30 minutes.
Waterproof membrane should also be applied with a sponge roller following the instructions on the package. Depending on the substrate and conditions dry time will vary.
Either primer must be completely dry prior to installing tile.


3/4 APPLY IMMEDIATILE
Lightly draw your layout directly to the prepared surface with a pencil. This will help set leveling lines that you can follow.
Have your design drawn and measured out in advance of setting ImmediaTile.
AII ImmediaTile should be removed from the packages and inspected.
When using the same tile from several packages, the material should be mixed for best effect.
Tile can be lightly placed onto surface to confirm position. Place the tile gently in position at first, check position, adjust …..then PRESS to create a permanent bond.
Bond will become permanent when tile is pressed firmly onto surface.
Remove and discard release paper one tile at a time.
Start setting tile in the center of your work surface. Work outward in two directions – leaving the cut pieces for the edges.
Use tile spacers to ensure consistent grout joints.
It is extremely important to firmly press the tile into place prior to grouting


4/4 GROUT & CLEAN UP
To ensure a successful installation, only ImmediaTile Grout should be used with ImmediaTile.
Grout should be firmly pressed into the joints using a rubber float. Be sure to follow directions on the packaging.
It is recommended grout a small area at once. When a dry haze forms on the tile it will be necessary to clean the tile with a soft and clean cloth. It is important not to allow the haze too long as it will be more difficult to clean from the tile surface.

How to lay tiles without masonry
")
